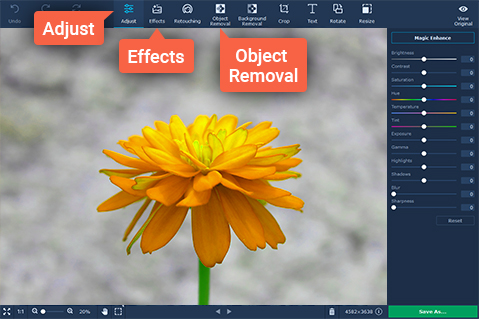
Having a photo editor software is necessary if you want to share your pictures online on a social media site or publish it in a brochure or publish it on your website. Movavi Photo Editor is affordable and offers all the tools that most people need for editing their pictures. It includes all the basic photo editing features such as crop, add text, resize by dimensions/percentage and magic enhance. All the tools are neatly arranged on the right side so that you can easily access them.
The magic enhance tool allows you to enhance the photo by adjusting sliders that can make changes to the brightness, shadows, exposure and etc of the photo. The crop tool is especially useful for cropping away the unwanted edges of the photo as Windows do not include a free image cropping tool. The rotate tool allows you to flip the photo horizontally/vertically or straighten the photo at various angles.
Many people like to add text onto the photo before uploading online. You must select the Text tab and click the Add Text button before the dotted white box will appear for you to input the text. The text editor allows you to change the font type and set how big or small you want the text to appear. You can change the text alignment and rotate it to appear at a slanted angle. The color of the text and the text background color can also be changed. If you want to erase all text, you simply click the remove all text button.
The Movavi Photo Editor shows that you can make a photo perfect by removing the blemishes. In Movavi Photo Editor, you will find the object removal tool which allows you to use a brush tool to mark unwanted objects in red and click a single button to remove them. The object removal tool makes it less time consuming for you to edit a photo compared to the clone stamp tool in traditional photo editing software. It will draw a yellow boundary line to let you know whether you have mark the unwanted object accurately.
Everythng that is within the yellow boundary line will be deleted when you press the Start Erasing button. You can use the brush tool to mark the unwanted object again if the yellow line did not accurately draw a boundary. The marked object will quickly disappear and the background will show similar pattern that is regenerated from the nearby area. Clicking on the eye button at the bottom will revert back the removal of the unwanted object.
Movavi Photo Editor has also included a background removal tool for users who find the backgrounds of their photos boring and wish to use more interesting backgrounds for their photos. It allows you to select the unwanted background and remove it with a single click of a button. The first step is to select the brush button with the small green plus symbol.
The green brush tool is for marking the objects you want to retain in the photo. Next, you must click the brush tool with the small green red minus symbol. The red brush tool is for marking the unwanted background. You just have to simply draw a few red lines on the background on both side of the object you want to retain.